Developing a Zephyr Freestanding C++ Application v4
[!NOTE] This post is an updated version of the original Developing a Zephyr Freestanding C++ Application targeting Zephyr v4.4.0 and the Raspberry Pi Pico W.
The freestanding pattern keeps your app in its own Git repository, separate from the Zephyr source tree. This simplifies version control and avoids coupling your codebase with the OS internals 1.
This guide walks you through setting up a C++20-ready freestanding Zephyr project for the Raspberry Pi Pico W using the latest Zephyr v4.4.0. We will configure an isolated workspace, install the SDK, and build your application independently.
What’s New in v4.4 & Why It Matters #
Compared to the original guide, updating to Zephyr v4.4.0 and SDK 1.0.1 brings several key improvements:
- C++20 Support: You can now natively target C++20 by adding
CONFIG_STD_CPP20=yto leverage modern templates, concepts, and cleaner code patterns. - Pico W Support: The workspace and board configurations default to the Raspberry Pi Pico W (
rpi_pico/rp2040/w), using the updated hierarchical board naming convention. - Out-of-the-Box Pico W Wireless: While setting up Wi-Fi on the Pico W was complex and required manual driver compilation in earlier Zephyr versions, v4.4.0 fully upstreamed and integrated native support—requiring only a single command (
west blobs fetch hal_infineon) to get the wireless chip running.
Requirements #
- Linux host (macOS and Windows also work)
- Raspberry Pi Pico W2
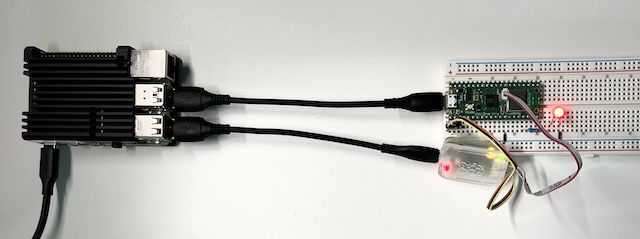
- Raspberry Pi Debug Probe3
- Optional: LED wired as in the Embedded Rust with Pico guide4
Step 1 – Workspace & Toolchain Setup #
Run the following commands to create an isolated workspace, fetch dependencies (narrowed to only the core components needed for the Pico W to save space), and install the compiler:
# 1. Create virtual environment and workspace
mkdir ~/zephyrproject && cd ~/zephyrproject
python3 -m venv .venv
source .venv/bin/activate
pip install west

# 2. Initialize the workspace (pinned to Zephyr v4.4.0)
west init -m https://github.com/zephyrproject-rtos/zephyr --mr v4.4.0 .

# 3. Fetch only the required hardware modules:
#    - cmsis_6: ARM Cortex-M core support
#    - hal_rpi_pico: RP2040 hardware abstraction layer
#    - hal_infineon: CYW43439 Wi-Fi chip driver library
west update --narrow cmsis_6 hal_rpi_pico hal_infineon

# 4. Register Zephyr with CMake and install Python requirements
west zephyr-export
west packages pip --install

# 5. Download the proprietary firmware binary blobs for the Pico W Wi-Fi chip
west blobs fetch hal_infineon

# 6. Install the ARM cross-compiler SDK
cd zephyr
west sdk install --toolchains arm-zephyr-eabi --version 1.0.1
Now you have the minimum tools required to build Zephyr firmware for the Pico W.
Step 2 – Verify Tool Versions #
Ensure your host tool versions match the baseline requirements. You can check your installed versions by following Step 2 of the original guide (note that Zephyr v4.4.0 now requires at least Python 3.12).
Step 3 – Create a New Project #
A template repo gives you a ready-made CMakeLists, sample prj.conf, and board setup for you focus on code, not
scaffolding.
Click Use this template ↗ and create your repo under GitHub.
Clone it locally and enter the directory:
git clone git@github.com:<your-username>/<your-new-project>.git
cd <your-new-project>
Edit
CMakeLists.txtorprj.confonly as needed.
Step 4 – Sourcing the Environment #
Before building, activate your Python virtual environment and source Zephyr’s internal environment script to load all required paths:
source ~/zephyrproject/.venv/bin/activate
source ~/zephyrproject/zephyr/zephyr-env.sh
Use the official west meta-tool to compile, program, and monitor your Pico W:
Build – compiles the application.
- For a clean build (required if you change configuration):
west build -p always -b rpi_pico/rp2040/w - For incremental builds:
west build
- For a clean build (required if you change configuration):
Flash – programs the Pico W through the Debug Probe (SWD):
west flashLog – monitors the serial logs. You can open the UART console using
tio:tio /dev/ttyACM0
C++ Integration Notes #
- Enable C++: add
CONFIG_CPP=yand set the standard, e.g.CONFIG_STD_CPP20=y. - Avoid static locals inside
main(); they require guarded initialization. - Use
k_thread_create()ork_workfor background work instead ofstd::thread.
Summary #
This guide helps you build a standalone Zephyr project for the Raspberry Pi Pico W using a clean, template-based setup. It keeps your application independent of the Zephyr source tree, ensures reproducible builds by sourcing the environment script, and streamlines development using native west commands for building, flashing, and logging. With minimal changes, you get a C++20-ready environment tailored to the constraints of the Pico W—making it fast to get started and easy to maintain.
References #
Zephyr Getting Started Guide – official steps for initializing and using Zephyr. ↩︎
Raspberry Pi Pico Documentation – overview and specifications. ↩︎
Raspberry Pi Debug Probe – SWD + UART adapter for flashing and logging. ↩︎
Embedded Rust with Pico – hands-on guide showing LED wiring and UART logging. ↩︎